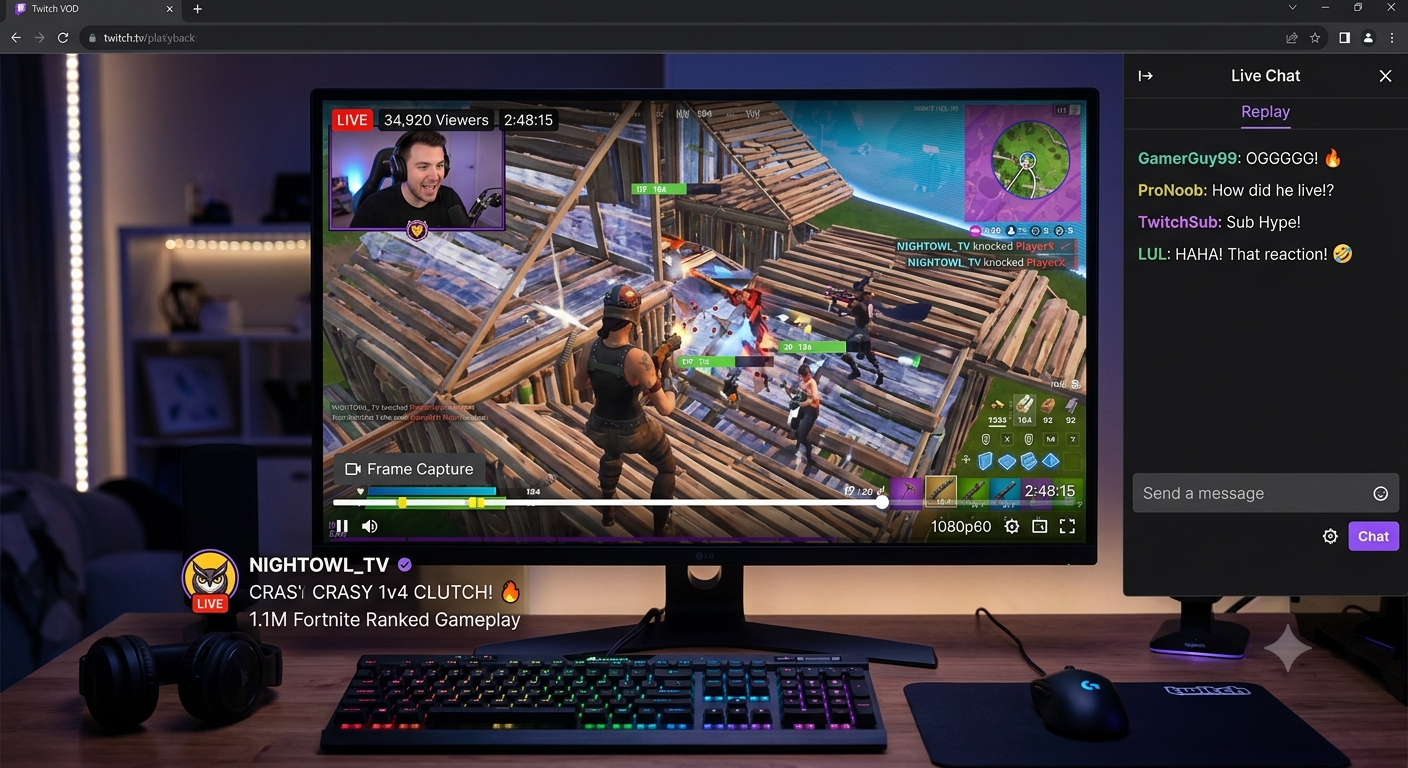
How to Capture a Frame from a Twitch Clip or VOD
You can capture a frame from a Twitch clip or full VOD by copying its link into an online frame grabber, or by pausing playback and taking a screenshot directly, with the frame grabber method generally producing a cleaner result without Twitch's player interface included.
Twitch content comes with a few specific quality considerations tied to how live streaming works, and this guide covers both the standard extraction process and the Twitch-specific quirks worth knowing before you start.
Twitch Clips vs. full VODs, what's the difference?
Clips are short, user-created highlights, typically a few seconds to a minute long, clipped from a longer stream by either the streamer or a viewer. They're designed to be easily shareable and usually have a straightforward, stable link.
VODs (Video on Demand) are the full, saved recordings of an entire stream, often hours long. These are useful when you need a moment that hasn't already been clipped by someone else, but require more scrubbing to locate a specific point.
The extraction process is similar for both, though navigating a full VOD to find your exact moment takes more effort than working with an already-short clip.
- How to Find the Exact Frame Timestamp Using YouTube Subtitles
- How to Take a Scrolling Screenshot on Any Device
- How to Grab Frames in DaVinci Resolve
- Keyframe vs a Regular Frame
Using an online frame grabber
- Open the Clip or VOD on Twitch and copy its link, either from the address bar or using Twitch's built-in share button.
- Paste the link into an online frame grabber tool.
- Scrub to your chosen moment using the tool's timeline or timestamp field.
- Capture and download the frame.
This approach pulls the frame directly from the video stream, avoiding Twitch's chat panel, player controls, and other interface elements that a screenshot would otherwise include.
Direct screenshot
- Open the Clip or VOD and let it play to your chosen moment.
- Pause the video at that point.
- Take a screenshot using your device's standard method:
- Windows: Windows plus Shift plus S
- Mac: Shift, Command, and 4
- Phone: your device's standard screenshot shortcut
- Crop out Twitch's interface elements chat, player controls, and channel info afterward in a photo editor if you want a clean image of just the video content.
Navigating a long VOD to find your moment
Since full VODs can run for hours, a few features help narrow down your search:
Twitch's chat replay. As you scrub through a VOD, Twitch displays chat messages synced to that point in the recording a spike in chat activity often indicates a particularly notable or reacted-to moment, which can help you locate a memorable point faster than blind scrubbing.
Existing clips from the same stream. If a moment you're looking for was popular, someone may have already created a Clip from that section, which you can find through the channel's Clips tab — even if you want your own frame rather than using the clip directly, it points you to roughly the right timestamp in the full VOD.
Stream markers, if the streamer added them. Some streamers manually mark specific moments during a broadcast, which can appear as reference points when browsing the VOD afterward.
Why Twitch content sometimes looks lower quality than expected
Live streaming inherently involves quality trade-offs. Since content is broadcast in real time, streaming setups generally use a lower bitrate than pre-recorded, carefully edited video, to keep up with real-time upload demands — this can mean even "source quality" Twitch content looks slightly softer than similarly-resolution pre-recorded footage.
Recommended Articles
 SOCIAL MEDIA FRAME CAPTURE
 SOCIAL MEDIA FRAME CAPTURE
SOCIAL MEDIA FRAME CAPTURE
SOCIAL MEDIA FRAME CAPTURE
 SOCIAL MEDIA FRAME CAPTURE
Connection stability during the original broadcast affects quality. A moment captured during a streamer's connection hiccup will show more compression artifacts than a moment captured during a stable stretch of the same broadcast.
VODs are sometimes only available for a limited time or at reduced quality, depending on the streamer's specific settings and Twitch's own storage policies always check what quality options are actually available for a specific VOD before assuming a particular resolution is accessible.
- How to Save a Frame from an Instagram Reel
- How to Capture Video Frames Using Windows Photos App
- How to Download a YouTube Thumbnail in Full Resolution
- Video Resolution Explained: 720p vs 1080p vs 4K
Getting the cleanest possible frame
Check the quality settings in the player before extracting, and select the highest resolution option available, similar to any other streaming platform.
Look for moments with less on-screen movement, both from the streamer's content itself and from any overlays like a webcam feed or alert graphics, since a calmer moment generally produces a sharper extracted frame.
Consider whether you want overlays included or not. If a webcam feed, chat overlay, or alert box is positioned in a corner of the frame you don't want, cropping it out afterward in a basic photo editor is usually the simplest fix.
Common issues and fixes
The frame grabber tool won't load the Twitch link. Some frame grabber tools may have more limited support for Twitch specifically compared to more universally supported platforms a screenshot remains a reliable fallback if a specific tool doesn't work with the link.
The VOD isn't available anymore. Twitch VODs aren't stored indefinitely by default, and availability depends on the streamer's specific settings if a VOD has expired, only Clips created from that stream before expiration will still be accessible.
The extracted frame includes an unwanted overlay. Crop it out afterward in any basic photo editor, assuming your desired subject isn't positioned in that same area of the frame.
Conclusion
Capturing a frame from Twitch content follows the same basic principles as other streaming platforms a frame grabber tool for the cleanest result, or a direct screenshot as a reliable fallback, with attention to quality settings and Twitch's specific live-streaming quirks like connection-dependent quality and chat overlays. For long VODs, using chat replay activity or existing Clips as a guide can save significant time compared to blind scrubbing through hours of footage.
FAQ
Is there a difference in how you extract a frame from a Clip versus a full VOD?
The extraction process itself is the same, but finding your exact moment in a full VOD generally takes more effort, since VODs can run for hours compared to a short, already-trimmed Clip.
Why does Twitch content sometimes look softer than similarly-resolution YouTube video?
Live streaming generally uses a lower bitrate than pre-recorded, edited video, due to the real-time demands of broadcasting, which can result in comparatively softer frames even at a similar stated resolution.
How long are Twitch VODs available before they expire?
This depends on the streamer's specific account settings and Twitch's own policies, so availability can vary Clips created from a stream generally remain accessible longer than the full VOD itself.
Can I extract a frame from a Twitch stream that's still currently live?
Not directly through most extraction tools you'll generally need to wait until the stream ends and saves as a VOD, similar to other live streaming platforms.
Does chat replay affect the video quality when scrubbing through a VOD?
No, chat replay is a separate synced overlay shown alongside the video and has no effect on the actual video quality or the frame you extract from it.